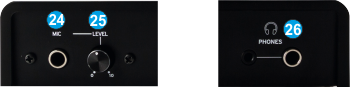
MIC INPUT. Connect a 1/4" microphone to this input. This input's audio signal is routed directly to the Program Mix and Cue Mix.
MIC LEVEL. Adjust the gain of the microphone input channel.
HEADPHONES SOCKET. Connect your 1/4" headphones to this output for cueing and mix monitoring.
Reloop Beatpad2 - Rear Panel
AUX INPUT. Connect your audio sources to this RCA input. The input can accept both line and phono-level signals, depending on the switcher next to the Input and its Output Level is controlled from the top panel (AUX knob)
MASTER OUTPUT (RCA): Use standard RCA cables to connect this output to a speaker or amplifier system. The level of this output is controlled by the Master knob on the top panel.
MASTER OUTPUT (XLR): Connect this low-impedance XLR output to a PA system or powered monitors. The level of this output is controlled with the Master knob on the top panel.
EQ-PRESET: Select the CLASSIC EQ (with High, Mid and Low operation for the Mixer knobs) or the FILTER EQ mode (with High, Low and Filter)
LED DIMMER: Adjust the brightness of the Leds when those are at the OFF position (dimmed).
USB. This USB connection sends and receives audio and control information from a connected computer.
POWER: Use the included power cable to connect the Beatpad2 to a power outlet. While the power is switched off, plug the cable into the Beatpad2 first, and then plug the cable into a power outlet. Use the Power Switch to turn the unit on and off. Turn on the unit after all input devices have been connected and before you turn on amplifiers. Turn off amplifiers before you turn off Beatpad 2.
POWER BUTTON. Use the Power Switch to turn the Beatpad2 on and off.