XONE 96
Configuration avancée
The Xone 96 offers 2 built-in USB Audio interfaces (sound cards) by connecting the device with a USB port of a computer using the USB 1 or USB 2 sockets at the rear panel and each one of them offers 12 Outputs and 12 Inputs.
RECORD & BROADCAST
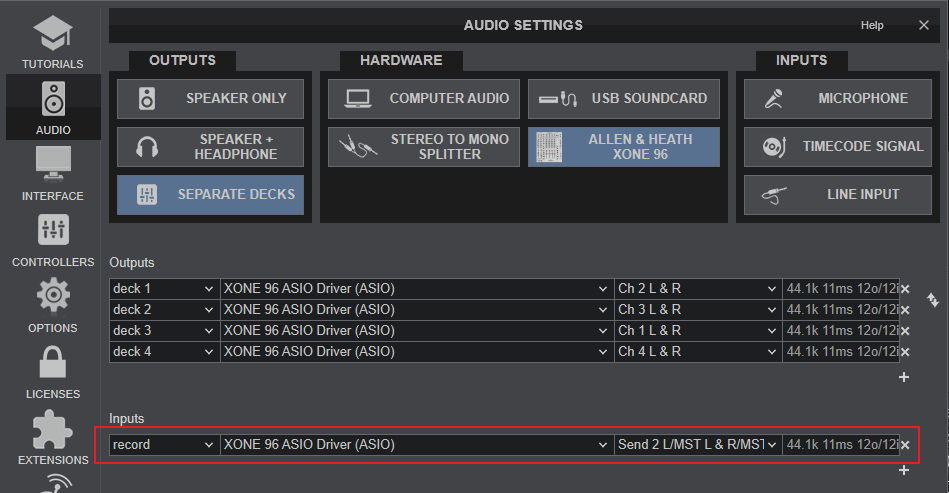
Recording your mix with a mixer applying it's own audio mixing, Equalizer, Gain, Filter etc, requires a dedicated Recording Input. By default VirtualDJ is using Inputs 11,12 (Send 2 L&R) which is included in the pre-defined Audio setup of VirtualDJ

IMPORTANT :
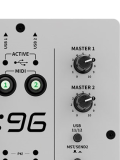
Make sure the USB 11/12 button below the MASTER volume knobs is set to MST (Off)

TIMECODE - DVS
The Xone 96 offers 4 stereo inputs suitable for Timecode (DVS) control to 4 VirtualDJ Decks, using CH Inputs 1 to 4. Read further information for Timecode Inputs at VirtualDJ Manual
- Depending on the DVS/Timecode device type (Turntable-Vinyl or CD), connect your Timecode device to the LINE or PHONO inputs at the rear panel of the Xone 96. Make sure the switchers below each Input is properly set to LN/PH depending on the connection.

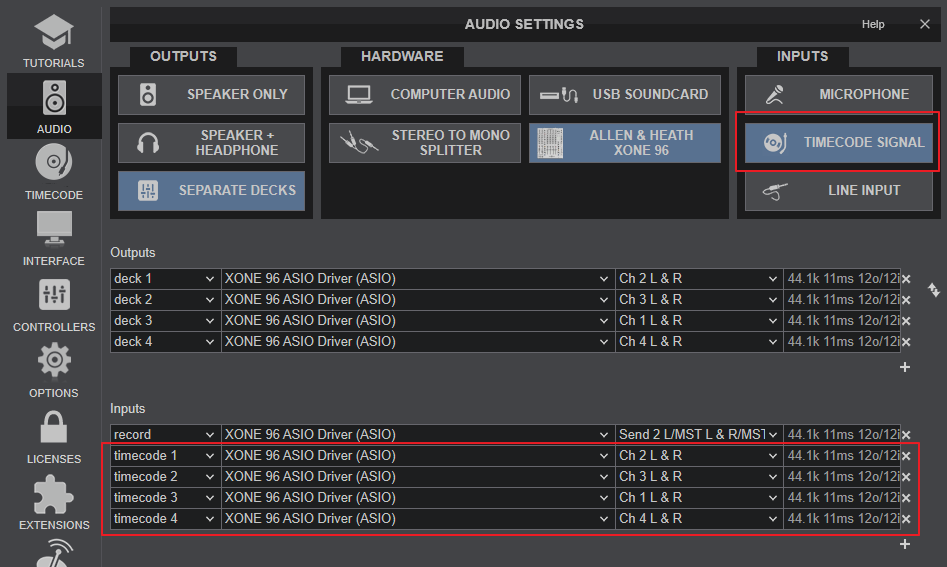
Xone 96 - Rear panel - Timecode Inputs - Open VirtualDJ Settings and select the AUDIO tab.
- Click on the TIMECODE SIGNAL button at the top-right and VirtualDJ will add the necessary inputs in Audio setup. You can remove the inputs that are not connected (e.g leave only 2 of them if you are using just 2 Timecode inputs)
- Click APPLY.

Note : For DVS control, the Ch1-Ch4 SOURCE rotaries at the top panel, need to be on USB 1 / USB 2 (not PH/LN)
X-LINK
A Allen & Heath Xone K2 device (or 2 if chained) can be connected to the XLINK port of the Xone 96 instead of USB, and allow the functionality of the Xone K2 in VirtualDJ.
The Xone K2 devices will not be visible in the CONTROLLERS tab of VirtualDJ Settings, but their MIDI functionality will occur through the Xone 96 device.
The functionality of the Xone K2 is explained in the K2 Manual
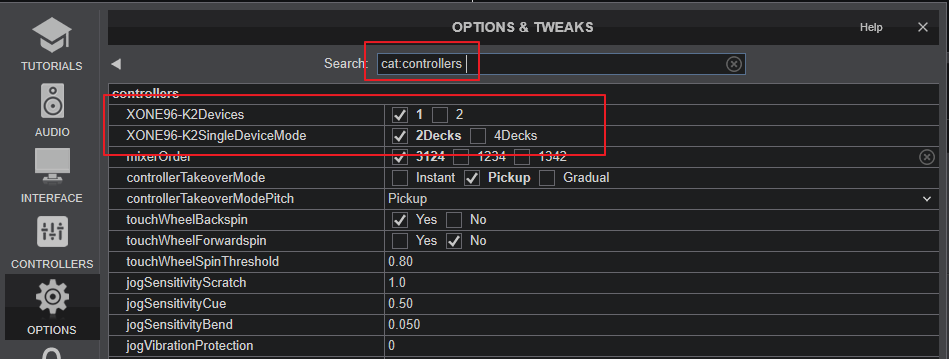
In Settings ->OPTIONS tab ->Controller category, you will find 2 K2-related settings that will auto-apply to the default Mapping of the K2 devices.


