User Manual


Interface - Platines - Contrôles Avancés  

Pads


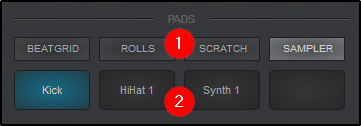
Pads are a dynamic way to quickly access and trigger commonly used functions. On each deck is a set of pads that can be used to trigger various built in functions as well as customized ones, depending on the Layout chosen. VirtualDJ offers a wide selection of default pages, but more pages can be added if required in the Pads Editor.
Starter Layout


Essentials Layout


Pro & Performance Layouts


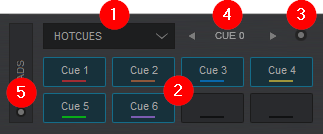
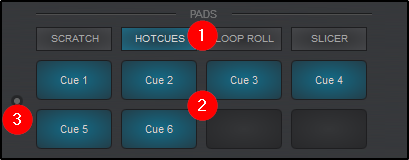
  1. PAGE. Displays the Pad Page selection which differs in each Layout:

    Starter Layout. Pages are static and can not be altered.

    Essentials Layout. Pad pages are displayed in a Button style view. Right clicking on any Pad Page will display a menu to select other pages or Edit... to open the Pads Editor.

    Pro Layout. Pads are displayed in a drop-down style view, but can be switched to a Button style view by clicking on the Pads Toggle. Clicking on the drop-down arrow to the right of the Pad Page selection will display a menu to select other pages or Edit... to open the Pads Editor.

  2. PADS. Clicking on the pads will trigger the specified action for that pad and page combination. A right-click(shift) on any pad will trigger an alternate action if the pad is also mapped with a shift command (See Pads Editor).

  3. PADS MENU (Essentials & Pro Layouts). Each page offers an optional Pads Menu that provides different options for the specified page. Not all pages offer a default menu, but can be added in the Pads Editor if required.

  4. PARAMETERS (Pro Layout). Each page offers 2 parameters that are displayed (if they have been set for the specified page) and can be cycled with the left and right buttons. Hovering a mouse to each side of the parameter will display the button for the desired parameter. Clicking on either button will cycle the specified parameter.

  5. PADS TOGGLE & SELECTION (Pro Layout). Clicking on the toggle will change the view from a drop-down style to favorites style display. Clicking on the selection button in the toggle provides the ability to enable or disable these views.


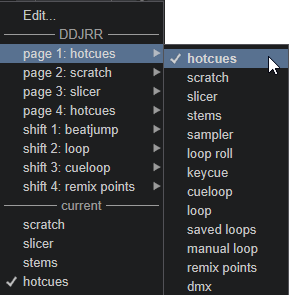
If a controller is connected to VirtualDJ, the Controller name will be displayed in the Page Menu and it will display the various pages assigned to the page buttons on the device. While hardware devices usually have a predefined silk screen for various pad functions such as Hot Cues, Samples, Loops, etc; VirtualDJ provides the ability to change these Pad Page modes directly from within the software in order for you to customize the hardware layout.

Depending on the number of Pad Page buttons on the device, VirtualDJ will display the number of pages available as well as Shift button actions in order to double the total number of pages available.
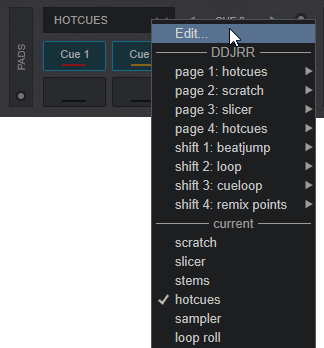

To assign a different function to a Pad Page, click on the Page drop down and hover over the Page number or Shift page number that you'd like to alter.

All available page assignments will display from the icon of the selected page. Click on the page you wish to replace from the menu. A check mark will indicate which page has been selected and the name of the page will automatically change for easy reference.


*Note: Some page assignments are not available on certain controllers due to being locked by the manufacturer. If a page is locked, the icon will not be displayed.


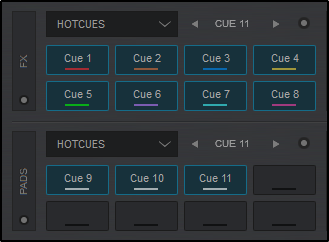
If a controller with 16 pads is connected to VirtualDJ, the FX panel will display pads 1 - 8 while the Pads panel will display pads 9 - 16 in order to keep the Pads display in order. Clicking on the FX toggle will restore the FX view and move pads 1 - 8 back to the Pads panel.

Additionally, if a 16 Pad controller is not connected but you wish to access 16 Pads Mode on VirtualDJ's GUI you can go to the View Selection button inside the FX toggle and select Pads 16.


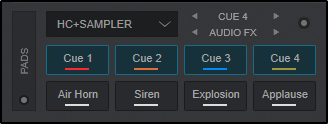
Split Pages provide the ability to combine 2 pad pages for easy access. The top row and Parameter 1 are dedicated to the first page, while the second row and Parameter 2 are dedicated to second page or split.


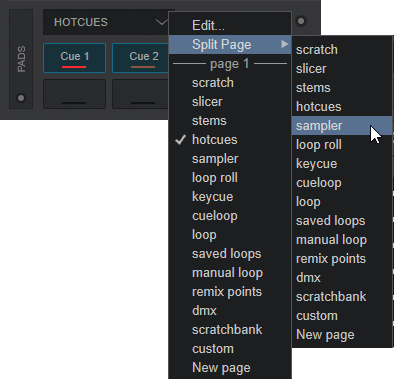
To create a Split Page be sure you are on the initial page that you wish to split and click on the drop-down menu. Select Split Page and select the 2nd page that you wish to take the position of the lower pads.

This also works on most controllers by holding the first pad mode button and then pressing the second one. Please consult the Hardware Manual for your device.

* Split Pages are not available when 16 Pad Mode is selected.


DEFAULT PAGES


HOT CUES
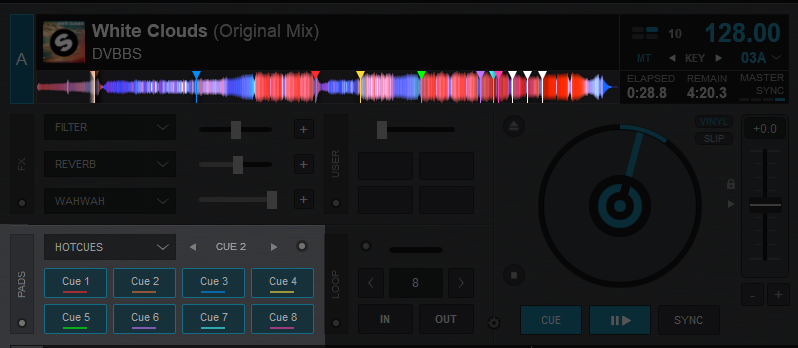


Hot Cues are flagged locations in a track that can be jumped to instantly on the fly. This gives the DJ the ability to jump to any position in the song without disrupting the audio. VirtualDJ displays 8 available Hot Cue slots in the Pads display by default, but also provides the ability to create and store an unlimited number of Hot Cues per track.
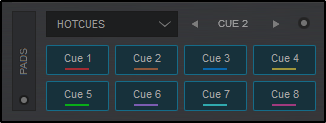
The HotCue page will display and store any HotCues that have been specified for the loaded track. Left clicking a Hot Cue Pad will set the Cue if no Cue is available and will trigger the Cue if it already exists. Right clicking (shift) a pad will delete the Hot Cue.


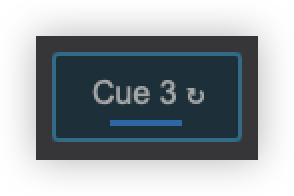
If a HotCue is set while a loop is active it will create a Saved Loop on the HotCue Pad Page and display a loop icon on the Cue to indicate that it is in loop mode.

HotCues can be managed in the Pads Editor and POI Editor.


Parameter 1

Cycles back and forth to the next or last Cue point if the deck is stopped or triggers the next/last Hot Cue if the deck is playing.

Parameter 2

Moves the track forwards or backwards by 1 beat increments (not visible by default)


PAD MENU

Edit CUEs and POIs...

Opens the POI Editor to edit CUE points and other POIs

Read-only (Lock)

Locks the Pads so that HotCues can not be accidently deleted

Smart Cue

Turns Smart Cue on or off

Quantize on Set

Will automatically set a new HotCue to the closest beat

Display mode

Changes how the Pads display the HotCues. Pads can show the Cue number (default), Cue Name, Time Position, Time Left or Beats Left.


Hot Cues also have various settings to alter their behavior or performance. These settings can be adjusted in the Options Menu:


hotcueMode
Play
The playhead will move to the selected Hot Cue and continue to play from that position.

Stutter
The playhead will move to the selected Hot Cue and will continue to play as long as the Hot Cue button remains held, acting more like a traditional Cue Point.

updateHotCueFromOnCombo
When a hot cue is pressed when holding the deck’s CUE button, it will update the cue point to the current cue position instead of jumping to the cue.

nonColoredPoi
Specifies a color for POIs that do not have a color set. Per Deck (default) will color all POIs the same color as the deck, Per Cue will add a different pre-defined color for each cue, or you can use one of 4 fixed colors: White, Red, Green or Blue.


*Note: Even though 8 Hot Cue points are offered in the Default GUI (which should cover the needs in most cases), VirtualDJ supports unlimited Hot Cue points which can be controlled using a custom skin, custom buttons, or keyboard/midi controller shortcuts.


STEMS (64 Bit versions)


The Stems page provides the ability to instantly use Acapellas and Instrumentals, or mute Vocals, Instruments, Bass, and Drums (Kick and HiHat) from the actively playing track in the deck in order to create remixes and/or mash-ups on the fly.

Clicking on a pad will remove the audio of the selected pad, while right clicking (shift) a pad will isolate the vocal or instruments.
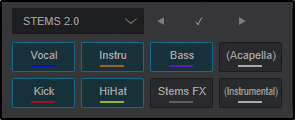

Additionally, effects can be applied to individual stems by toggling the Stems FX Pad. More information on Stems FX can be found on the Stems FX section of the Effects page.


Parameter 1
Stems 2.0

Displays the preparation status of the Stems. A will display when it is safe to start using the stems without interruption.

Parameter 1
Stems (FAST)

Increase or decreases the Bleed of Vocals or Instruments of the current Pad being used. 4 Bleed adjustments are available: Mute Vocals, Isolate Vocals, Mute Instruments, and Isolate instruments. The Bleed percentage can be set differently or adjusted live for each pad action.

Parameter 2

Empty


For more details on Stem Separation and how it works with the EQ, please see: https://virtualdj.com/help/stems.html


LOOP ROLL
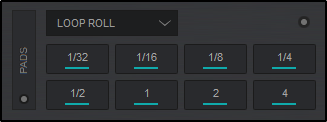

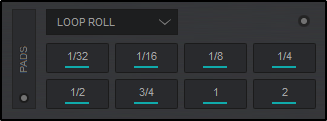
The Loop Roll page provides the ability to instantly create a loop roll by a specified number of beats while the pad is held. Releasing the pad will allow the track to continue from the place that it would have been in as if no loop was triggered.


Right clicking (shift) a pad will offer an additional size (¾) which will move the 1 and 2 beat selections to the right. 4 beats is removed.


Parameter 1

Empty

Parameter 2

Empty


PAD MENU

Apply to Video

Applies Loop Roll actions to the video output (off by default)


SLICER


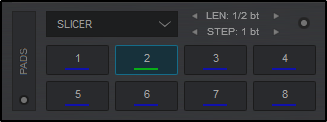
Slicer provides the ability to slice up a track similar to a loop roll. The track is divided into 8 steps (1 beat by default) that move along with each beat (step) of the track. Pressing each Pad will loop (slice) the last displayed step. When the pad is released, the track will continue to play from the position that it would have been in as if nothing happened at all.


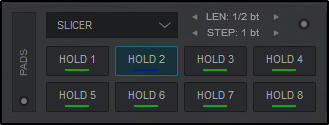
Right clicking (shift) the pads will provide Slicer Hold mode. This memorizes the Slice so it can be easily returned to at a later point without disrupting the tracks current position.


Parameter 1

Increases or decreases the slice length (1 beat by default)

Parameter 2

Increases or decreases the step size


PAD MENU

Apply to Video

Applies Slicer actions to the video output (off by default)


SAMPLER


The Sampler page will display the first 8 pads of the active sample bank. Clicking on a Pad will start/stop the selected sample, while right clicking (shift) will stop a triggered sample.

If the pad is empty, clicking on it will record a StemSwap sample (or regular sample if StemSwap Bank is unchecked) that can be used immediately with the playing track and will swap the corresponding stems playing in the deck with the sample's stems. Sample recording behaviour can be changed in the Pads Menu.
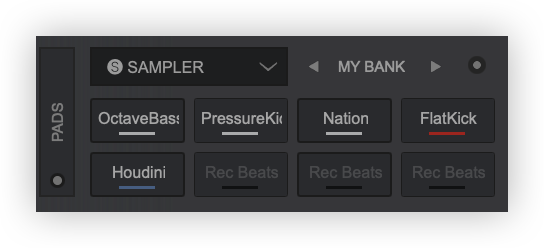

If a sample is not playing, it can be removed directly from the pad by using right-click (Shift+click). The option to lock the bank is provided in the Pads Menu to disable recording and deletion.

When using a Shift action the Pads will display Parameter 2 (if 8 or less sample pads are being used) without changing the Pads displayed.
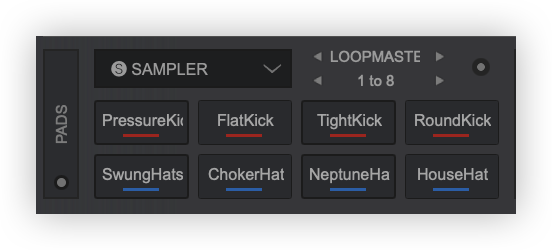


Parameter 1

Moves forward or backwards through all available sample banks.

Parameter 2

Cycles samples in the bank (If more than 8 samples are in the bank).


PAD MENU

StemSwap bank

Enables/disables the StemSwap bank sampler recording mode. If StemSwap is enabled an additional option to Record slots... will also be available providing the ability to select which stems are recorded on each individual Pad.

Locked bank

Enables/disables bank locking. Locking a bank will not allow samples to be recorded or removed.


Record slots...

Defines what is recorded on the pads. Each individual pad can be customized to record the full track, or to select a single stem as well as multiple stems.

Record duration

Provides the ability to select from Drop, Manual Loop, and Automatic Loops of 4, 8, 16, and 32 beat lengths, as well as Follow Loop Size which is the loop size set in the Loop panel. When Drop or Manual Loop is selected press the Pad to start recording and press it a second time to stop recording (or long press to record short samples). The pad will display the duration of the recording once recording begins. If Loop with a defined duration is selected, a single press will record the loop instantly.

Audio output

Selects the audio output behaviour for Regular Banks. Audio can be routed to the Master, Trigger Deck, or a specific deck. StemSwap Banks are always routed through the Trigger deck (except if triggered from SideView) and cannot be changed. The ability to Apply Deck Effects is also provided.

Trigger Mode

Provides the ability to change sample trigger modes from On/Off, Hold, Stutter, and Unmute.


Edit bank in browser

Opens the bank in the browser view in order to be edited.

Clear bank

Clears the entire bank of samples. This option will not display if the bank is locked.


More information on the Sampler...


STEMS+FX
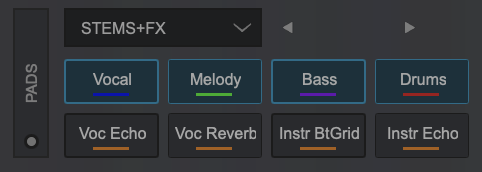

Stems and effects can be used together by using the dedicated Stems+FX page. The top 4 pads display stem separation for vocals, melody, bass and drums. The bottom 4 pads display the effects for vocals and instruments. Vocal Echo, Vocal Reverb, Instrument Beat Grid, and Instrument Echo are provided to quickly add an effect to the stem only.


Parameter 1

Shifts the focus of the pad buttons between All, Acapella and Instrumental

Parameter 2

Empty


PAD MENU

Beat Grid Pattern Instrumental

Opens/Closes the Beat Grid FX Pattern for Instrumentals


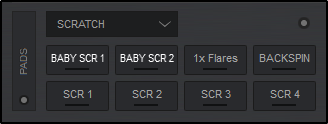
scratch


The Scratch Pad page provides the ability to instantly trigger an automated, pre-defined scratch in a single step. Each Pad will trigger a different scratch variation that will play without disrupting the beat grid of the track, giving you the ability to experiment with different scratch sounds while keeping the music flowing.


Parameter 1

Empty

Parameter 2

Empty


PAD MENU

DNA Editor...


Over

(When checked) allows the scratch to play over top of the track instead of cutting it

Quantized

(When checked) keeps the scratch on time to the tracks position


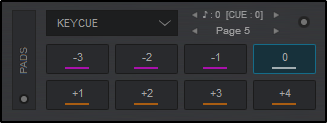
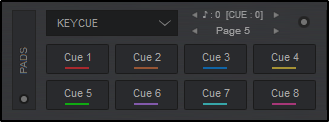
keycue


The Keycue page provides the ability to instantly trigger the selected Hot Cue and change it's key in a single step. Each Pad will trigger the same Hot Cue but in a different key and the track will continue to play in that key until the key is reset or any Hot Cue is triggered at the zero value. Each Keycue pad displays it's value in semitones.


Right clicking (shift) a pad will display the available Hot Cues that have been set. The preferred Hot Cue can then be selected to be used on the main Pads.


Parameter 1

Increases or decreases the key in one semitone increments

Parameter 2

Cycles forwards or backwards through the Keycue pages. 0 will always be displayed on each page.


PAD MENU

Edit CUEs..

Opens the POI Editor to edit Cue Points and other POIs

Smart Cue

Toggles Smart Cue on or off

Hot Cue Mode

Toggles between the two Hot Cue modes; Play or Stutter

Jump to Cue

Jumps to the Cue point and changes the key. Toggling to the off position will just change the key.


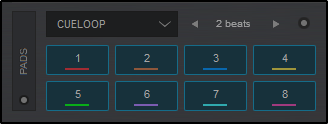
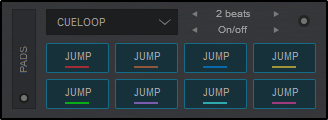
cueloop


CueLoop provides the ability to set and loop cue points instantly. A single click will set a cue point if no Cue point is set, while holding the button will set the cue point and loop it for the specified length of the parameter. If a Cue point is already set, a single click will jump to the specified Cue and set a loop-in point that can be manually set to loop out.


Right clicking a CueLoop will jump to the Cue position and loop from that point.


Parameter 1

Increases or decreases the CueLoop size (number of beats).

Parameter 2

Turn CueLoop Hold on or off (not visible by default)


PAD MENU

Auto Sync

Quantizes the CueLoop so that it stays on beat (similar to Smart Cue)

Only while pressed

CueLoops only function while the Pad is pressed


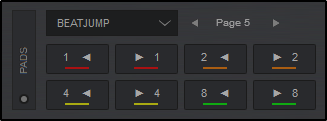
beatjump


The Beat Jump page provides the ability to jump forward/backwards by a specified set of beats.


Parameter 1

Cycles through predefined pages to increase and decrease the number of beats or bars displayed on the pads.

Parameter 2

Empty


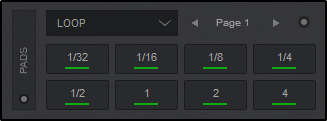
loop


The Loop page is an alternative to the Loop panel and provides the ability to instantly set a loop by a specified set of beats.


Parameter 1

Selects a Bank (Set of Loop sizes) starting from 1/32 up to 128 beats

Parameter 2

Changes the loop mode to on/off, hold, or roll (not visible by default)


PAD MENU

On/Off

The loop will trigger and remain on until the pad it is turned off.

Hold

The loop will only be triggered as long as the pad is held.

Roll

The loop will only be triggered as long as the pad is held and the track’s position will jump to the place it would have been in on release.


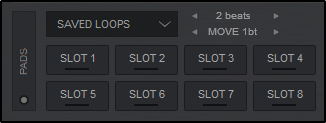
saved loops


The Saved Loop page will display and trigger any saved loops that you have created in the POI Editor. Clicking on an empty slot will save the loop to the pad and engage it, while holding a Pad will delete the saved loop. Once a loop is saved to a slot, left clicking will activate the Saved Loop but will not jump to its position if it's later to the track's current position (load-prepare).

Right clicking (SHIFT+Pad) will jump and engage any saved loops regardless of the play marker's position.

*Note: Only one Saved Loop can be active at a time.
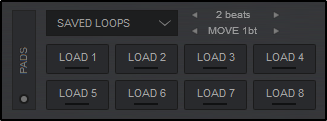

Saved Loops can be managed in the POI Editor.


Parameter 1

Increase or decrease the size of the saved loop (number of beats)

Parameter 2

Move the saved loop forward or backward in 1 beat increments


manual loop


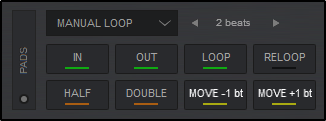
The Manual Loop page provides the most commonly used loop controls (see Loops), to set an In and Out point as well as adjust the size and position of the loop.


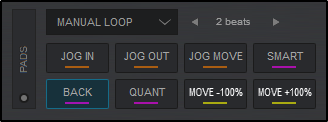
Right clicking (shift) the pads will give additional loop controls to adjust an enabled loops IN or OUT point as well as Move the entire loop with the use of the Jogwheel. Smart Loop, Loop Back and Quantize modes can be toggled on and off, and the entire loop can be moved forward or backwards by 100%.


Parameter 1

Increase or decrease the size of the loop (number of beats)

Parameter 2

Empty


remix points


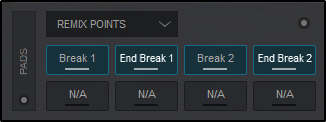
The Remix Points page offers all available Remix Points that have been either automatically analyzed by VirtualDJ or created in the POI Editor. Clicking on an empty pad (N/A) will add a Remix Point to the tracks current position. Remix points are managed in the POI Editor.


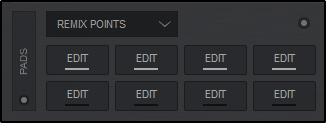
Right clicking (shift) the pads will display 8 EDIT Pads for each Remix Point. Clicking on the pad will open the POI Editor at the Remix Point selected.


Parameter 1

Empty

Parameter 2

Empty


PAD MENU

Edit CUEs and POIs...

Opens the POI Editor to edit Remix Points and other POIs


dmx


The DMX page allows you to connect DMX controlled lighting systems that function on the OS2L protocol.

For complete details on OS2L and how to connect, please see our OS2L - DMX Control Guide
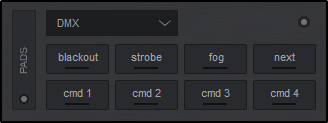


Parameter 1

Empty

Parameter 2

Empty


PAD MENU

Info...

Provides some basic info about OS2L


scratchbank


The Scratchbank page allows you to quickly access your favorite scratch samples and tracks instantly. You can drag and drop any file from the browser onto an empty pad to load the bank, or simply click on an empty pad to open the Scratch Bank Editor and load the file from the editor page.

Clicking on a pad will load the scratchbank pad to a deck. Right clicking or Shift+Click will unload the deck and revert to the previously loaded song that was originally in the deck before any of the Scratchbank Pads were loaded.
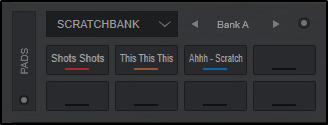


Parameter 1

Bank Selection

Parameter 2

Empty


PAD MENU

Edit


custom


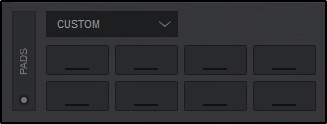
In order to cover all possible needs, features and actions, VirtualDJ has Custom Buttons as one of the Pads pages. This adds extra empty buttons and parameters to customize (via VirtualDJ script actions) any additional functions that may be individually needed but are not present in the Interface. By default, Custom Buttons remain blank but can be added in the Pads Editor.


Boutons personnalisables