Manuel utilisateur
Télécommande (Tablette)
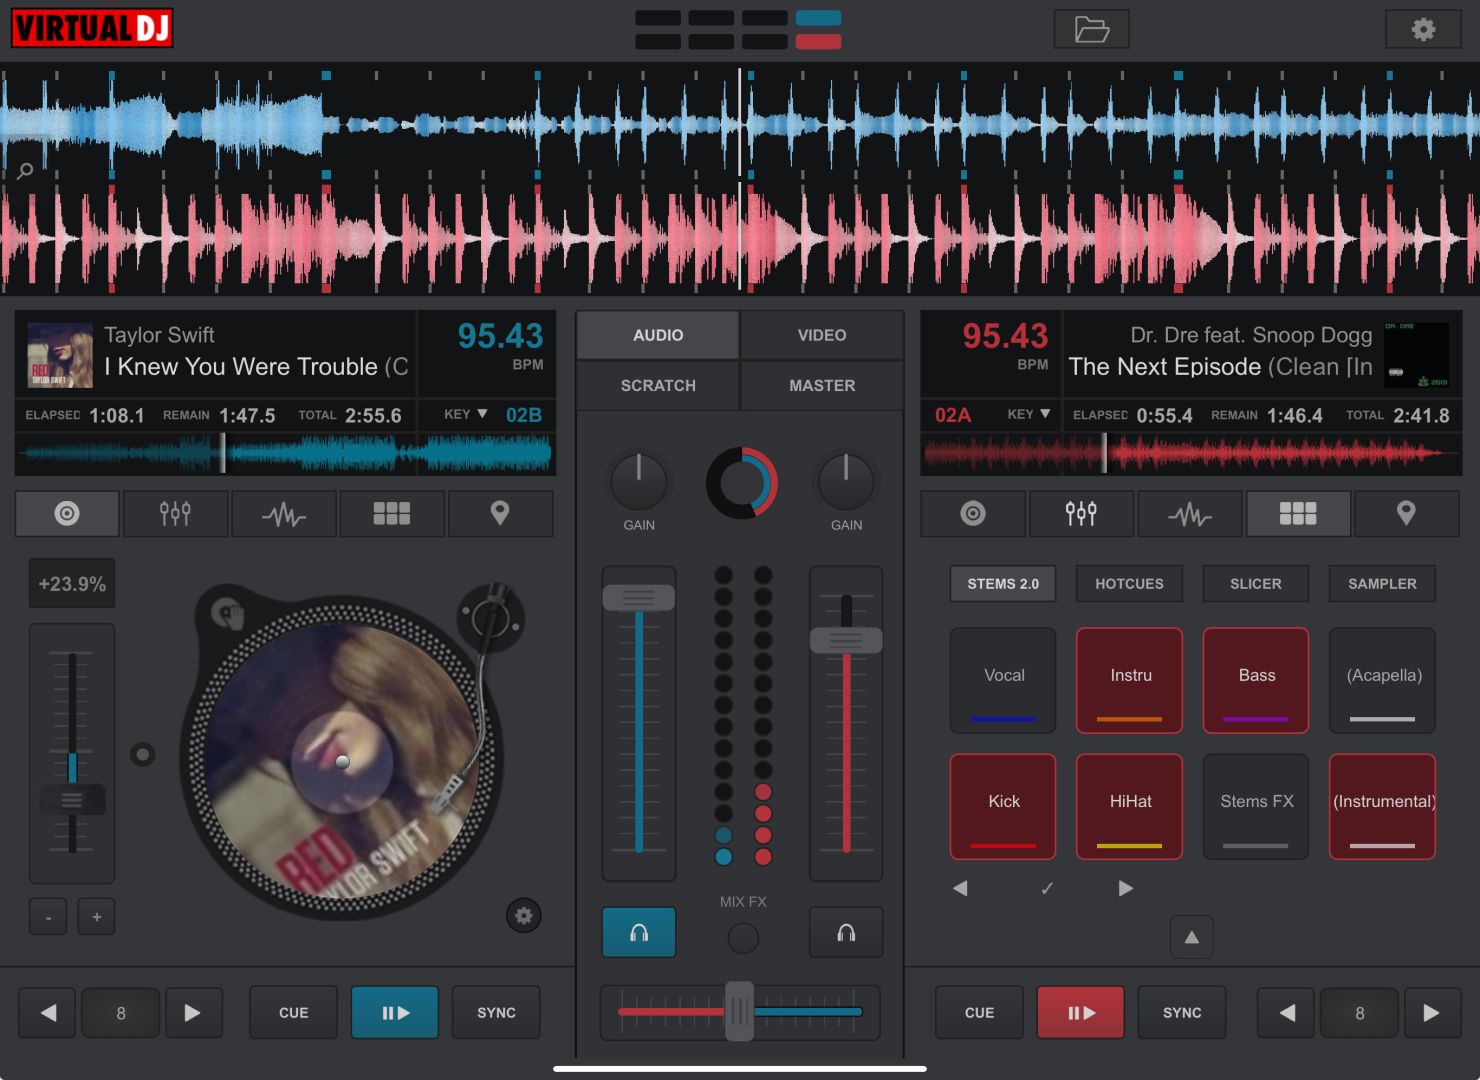
On a tablet, the VDJ Remote displays most of the information and controls in the main interface so that VirtualDJ can be monitored and controlled while away from the main computer. Anything that is done in the remote will directly reflect on the software interface on the computer as well. Multiple remotes can be connected and used at the same time.
APPLICATION CONTROLS
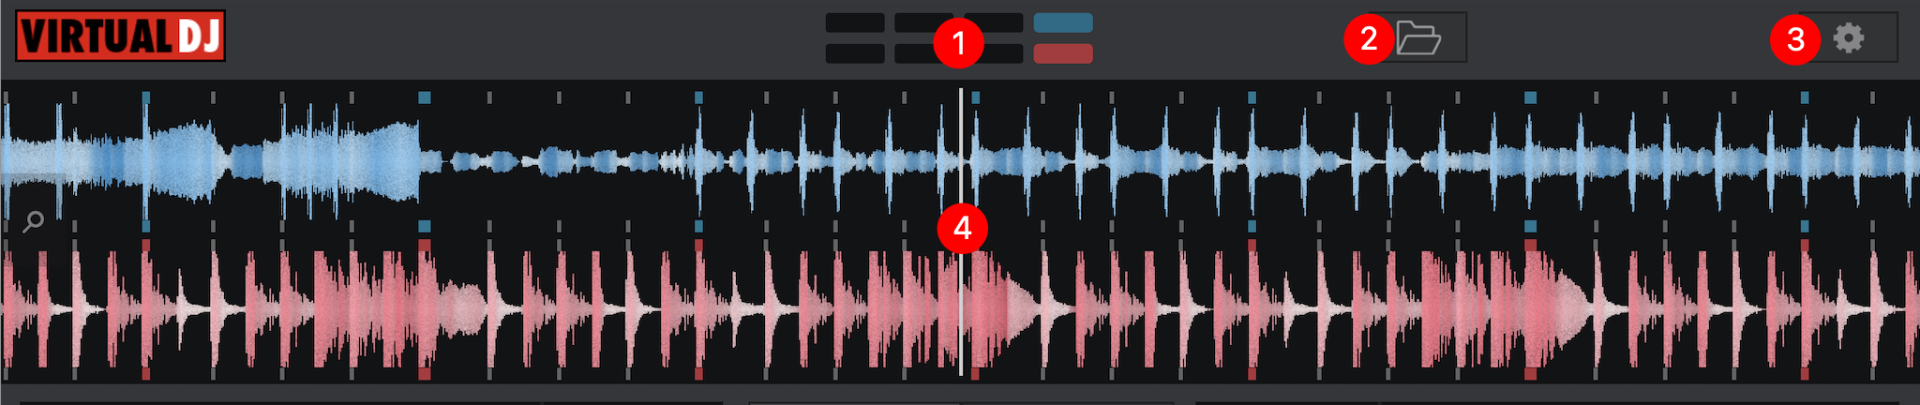
At the top of the Remote Interface are the Application Controls. This provides information on the current status of the software as well as controls to use different features.
- BEAT KEEPER - The Beat keeper indicates on which beat of the 4 beat bar the track is on.
- BROWSER - Opens the Browser display to access folders, files, and the Sideview.
- SETTINGS - Opens the Remote Settings which provides quick access to change the waveform, jogwheel display, and jogwheel type.
- RHYTHM WAVE & CBG - Displays the Rhythm Wave and Computerized Beat Grid of the current file(s) loaded and/or playing in the deck(s). Clicking on the magnifying glass icon to the left provides the ability to increase or decrease the size.
- DECK SELECTION (Portrait Mode Only) - Changes the view between Deck A, Deck B, or the Mixer.
*Not displayed in Landscape Mode
TRACK INFO & DECK DISPLAY
- TRACK INFO - Displays the Title, Artist, Cover Art, and BPM of the current track, as well as elapsed, remaining, and total time.
The waveform of the track is also displayed and can be used to scrub back and forth through the track.
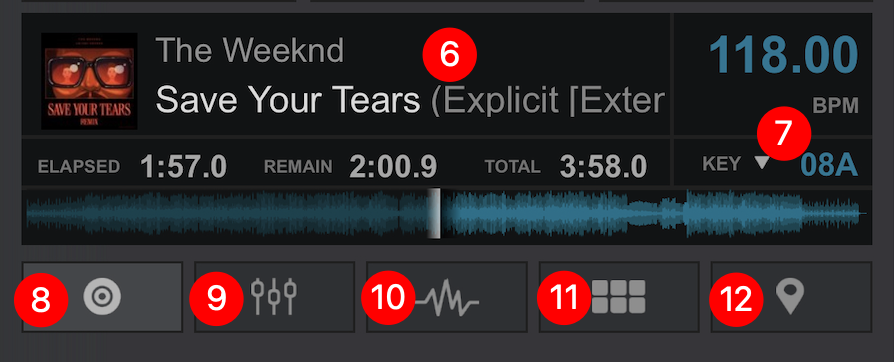
- KEY MENU - Displays the current key of the track. Touching the dropdown arrow will open the Key Menu where you can increase or decrease the current key by using the + and - icons on either side of the key display. Clicking on Match will change the key by up to one semitone on the opposing deck when a track is loaded. If the track has a greater difference than one semitone, it will remain unaffected.
- DECK - Displays the basic deck controls for the currently selected deck.
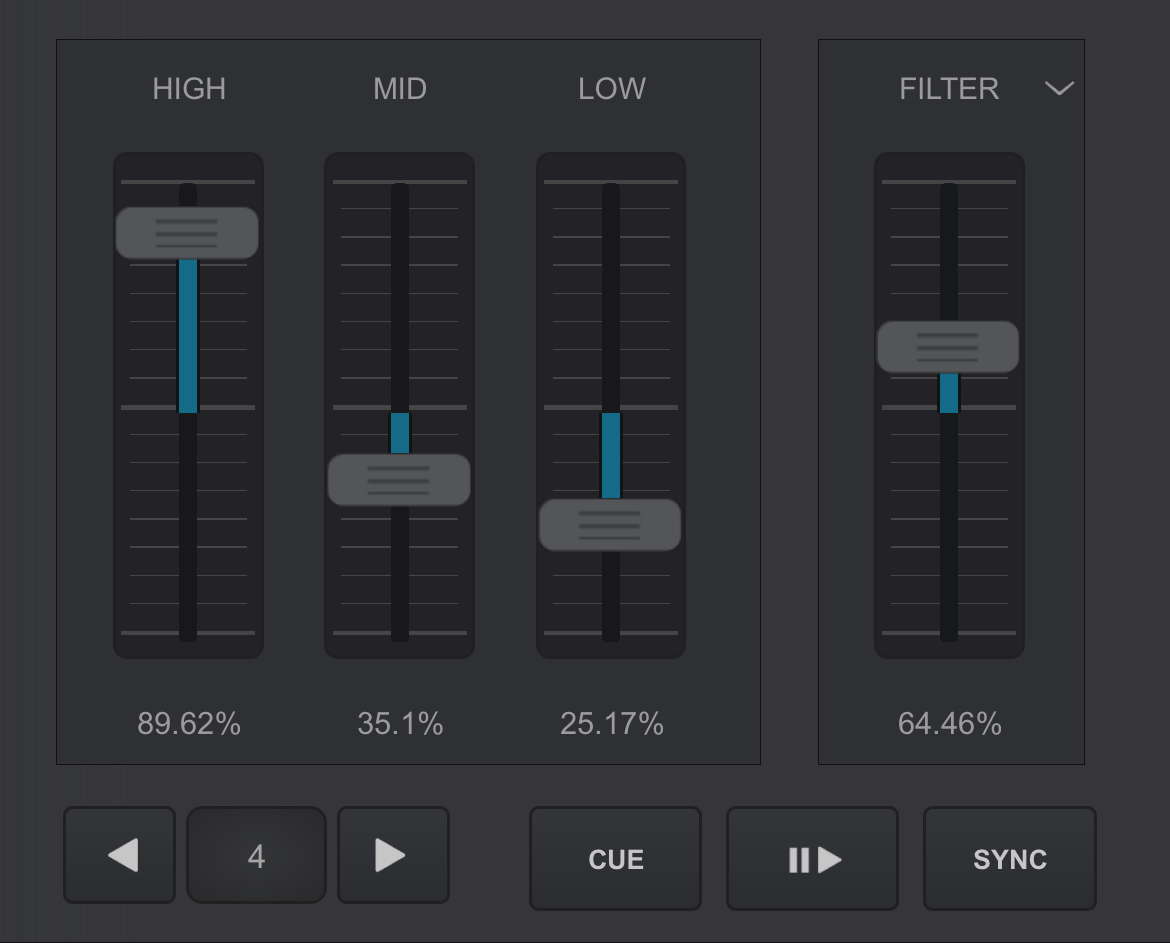
- EQUALIZER - Displays and controls the equalizer section for the specified deck.
- EFFECTS - Displays and controls the effects section for the specified deck.
- PADS - Displays and controls the pads section for the specified deck.
- HOTCUES & SAVED LOOPS - Displays and controls the hotcues and saved loops for the specified deck. 8 of each can be used in this section.
 BASIC DECK CONTROLS
- JOG MODE - Toggle between Vinyl Mode and CD Mode. In Vinyl Mode the Jog Wheel will emulate the sound of a record being scratched when the position is moved. In CD mode the jog wheel will bend the pitch when the position is moved.
- AUTOMIX (Portrait Mode Only) - Quickly turns Automix on and off *Not displayed in landscape mode
- JOG WHEEL - The Jog Wheel is used to Scratch or Bend the pitch of the track. It also displays the cover art of the track if selected in Settings.

- PITCH CONTROLS - The slider is used to increase and decrease the tempo (BPM) of the track by moving it up and down. Touching the dot to the outside center of the slider will gradually reset the pitch. Double-tapping the button will act as an instant reset.
Pitch Bend buttons (+/-) are offered under the pitch slider to temporary slowdown/speed up the track (Pitch Bend) while pressed. On release the pitch will reset to it’s previous value. - DECK OPTIONS - Tap on the Deck Options button to choose a different behavior for the Basic Control buttons, adjust the Pitch Range, Jog Wheel mode, and enable/disable Automated features. A full explanation of Deck Options can be found here.
- BROWSER (Portrait Mode Only) - Opens the Browser display to access folders, files, and the Sideview. *Not displayed in Landscape mode
- LOOPS - The size of the loop is displayed (number of beats) in the center and when tapped, engages/disengages an automatic loop. Touching the arrows to either side of the loop button will decrease the loop by half or increase it by double it's size.
- TRANSPORT CONTROLS - Offers CUE, Play/Pause, and Sync functions. The behavior of these buttons can be changed in Deck Options.
 EQUALIZER
Double tapping a slider of any of the adjusted parameters will snap back to their neutral positions quickly.
.png) EFFECTS
EFFECTSEffect parameters are controlled by touching and dragging the parameter sliders horizontally.
.png)
.png) PADS
PADSIf a Pad page has any parameters or settings, they will also appear below the pads for quick access.
.png)
.png) HOTCUES & SAVED LOOPS
HOTCUES & SAVED LOOPSTouching an empty slot will add a new hotcue or saved loop. Touching the X beside a filled slot will delete the cue or loop.
.png)
MIXER
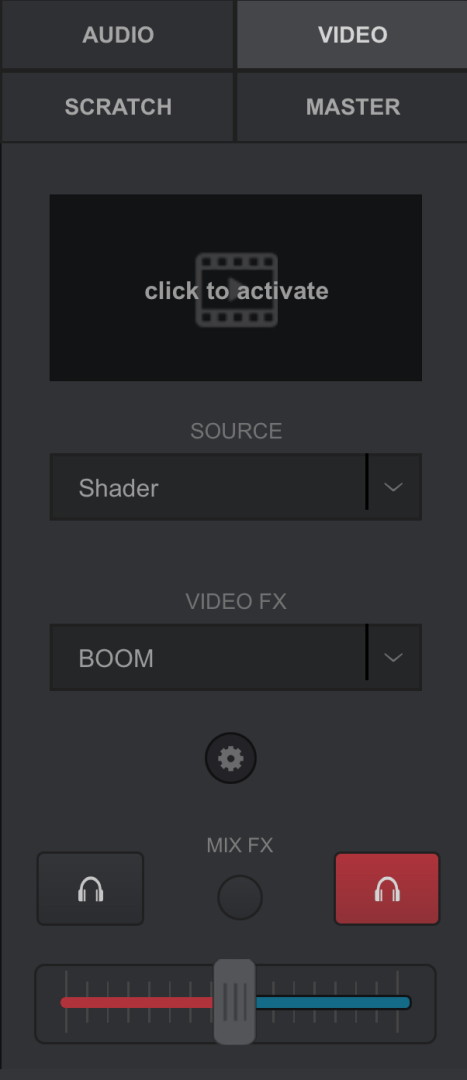
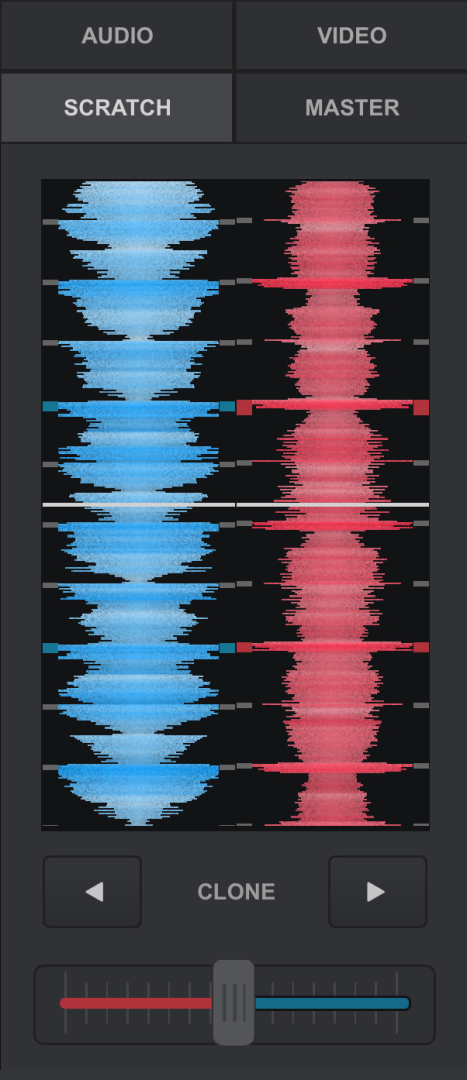
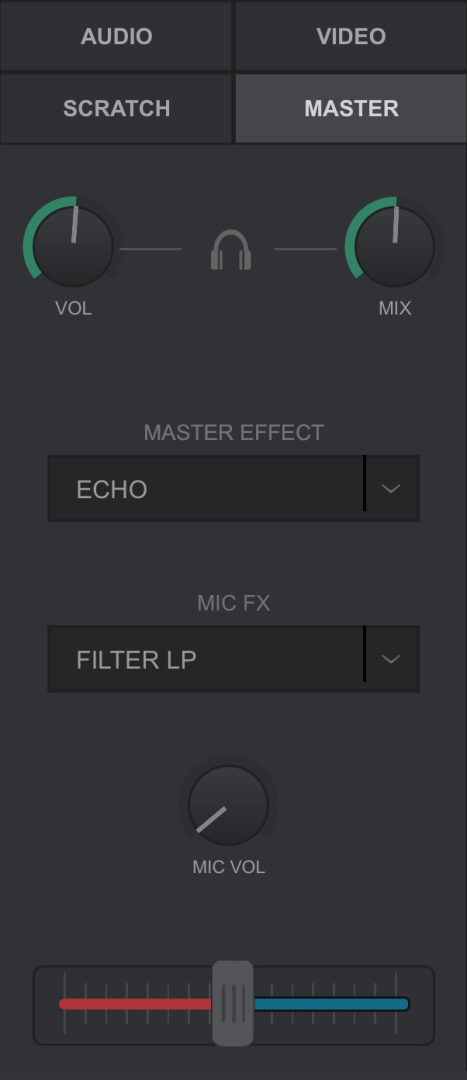
In Landscape Mode there are 4 separate mixers to choose from: Audio, Video, Scratch, and Master. When the tablet is rotated into Portrait Mode, only the Audio Mixer is available with a more detailed layout. Please see the Portrait View Layout for more details.